

Welcome to your One Week Patagonia road trip Itinerary.
Maybe it’s the unique freedom of the open road with only the mountains for company, or perhaps the vast emptiness of the landscape, but Patagonia feels like a world apart. Its allure to travellers is nothing new.
Ferdinand Magellan called it the “land of giants” and Bruce Chatwin mused “Patagonia … is the farthest place to which man walked from his place of origin.”
It was a landscape I had seen a hundred times on TV, in movies, and in coffee table travel books and had long dreamed of visiting. Finally, I achieved this with a friend in 2024 as we embarked on a Patagonia road trip.
While certain itinerary stops were best served with a tour booking, it was perfectly feasible, and considerably more enjoyable and cost-effective, to do this independently.
If you’re looking for the best hikes in Patagonia, want to know the best things to do in Patagonia or are looking for a Patagonia road trip itinerary… you’re in the right place.

With an area so vast, there are literally thousands of Patagonia road trip itineraries possible.
If you’re a first-time visitor and looking to see three of the most spectacular landscapes in Patagonia: Los Glaciares National Park and Glacier Pedro Moreno in Argentina and Torres del Paine in Chile, this Patagonia road trip itinerary is for you.
You’ll be immersed in Patagonia’s highlights, on both sides of the border, with stunning hikes and a taste of its rugged beauty.
What You Need to Know
Patagonia is HUGE – larger than France and Spain combined to be exact. It stretches across southern Argentina and Chile (representing over half of both countries’ land-mass), but contains less than 5% of their respective populations. The landscape is as diverse as it is vast, offering mountains, forests, grassland and even the odd dormant volcano. It also contains more than a dozen national parks, some as big as small European countries.
Travel tip:
The high season is December to February, and good-value accommodation gets snapped up super quickly. Book your hotels and car hire in advance to ensure the best deal.
For this Patagonia road trip itinerary, I recommend flying to El Calafate (c. 90 minutes from Buenos Aires) in Argentina and beginning your itinerary there. Car hire and bus connections are quick and easy from the airport.
Getting Around Patagonia
· El Calafate is well connected to other Argentinian airports with several flights a day from Buenos Aires, Ushuaia, Rosario, Trelew and Cordoba.
· Ground transportation at El Calafate is timed to coincide with incoming flights. Most international car hire companies have a presence here too – full list of services and prices here
· Whilst driving is the quickest and most convenient way between El Calafate and El Chalten (c. 2hrs), up to seven buses a day (journey time c. 3hrs) link the two.
Getting between Argentina and Chile
· There’s a daily bus between El Calafate and Puerto Natales (5–6 hours) departing at 8am. Tickets can be purchased at the terminal or online through Bus-Sur. Complete your Chilean Customs Affidavit form (available online) in advance of travel. Buses in the return direction leave at 7.30am and 3.30pm.
· Rules on cross-border car rental vary by company but always come with an associated fee, together with the standard one-way fee (normally c. $100 USD but check in advance). You’d likely be better off crossing by bus and picking up a new hire car across the border.

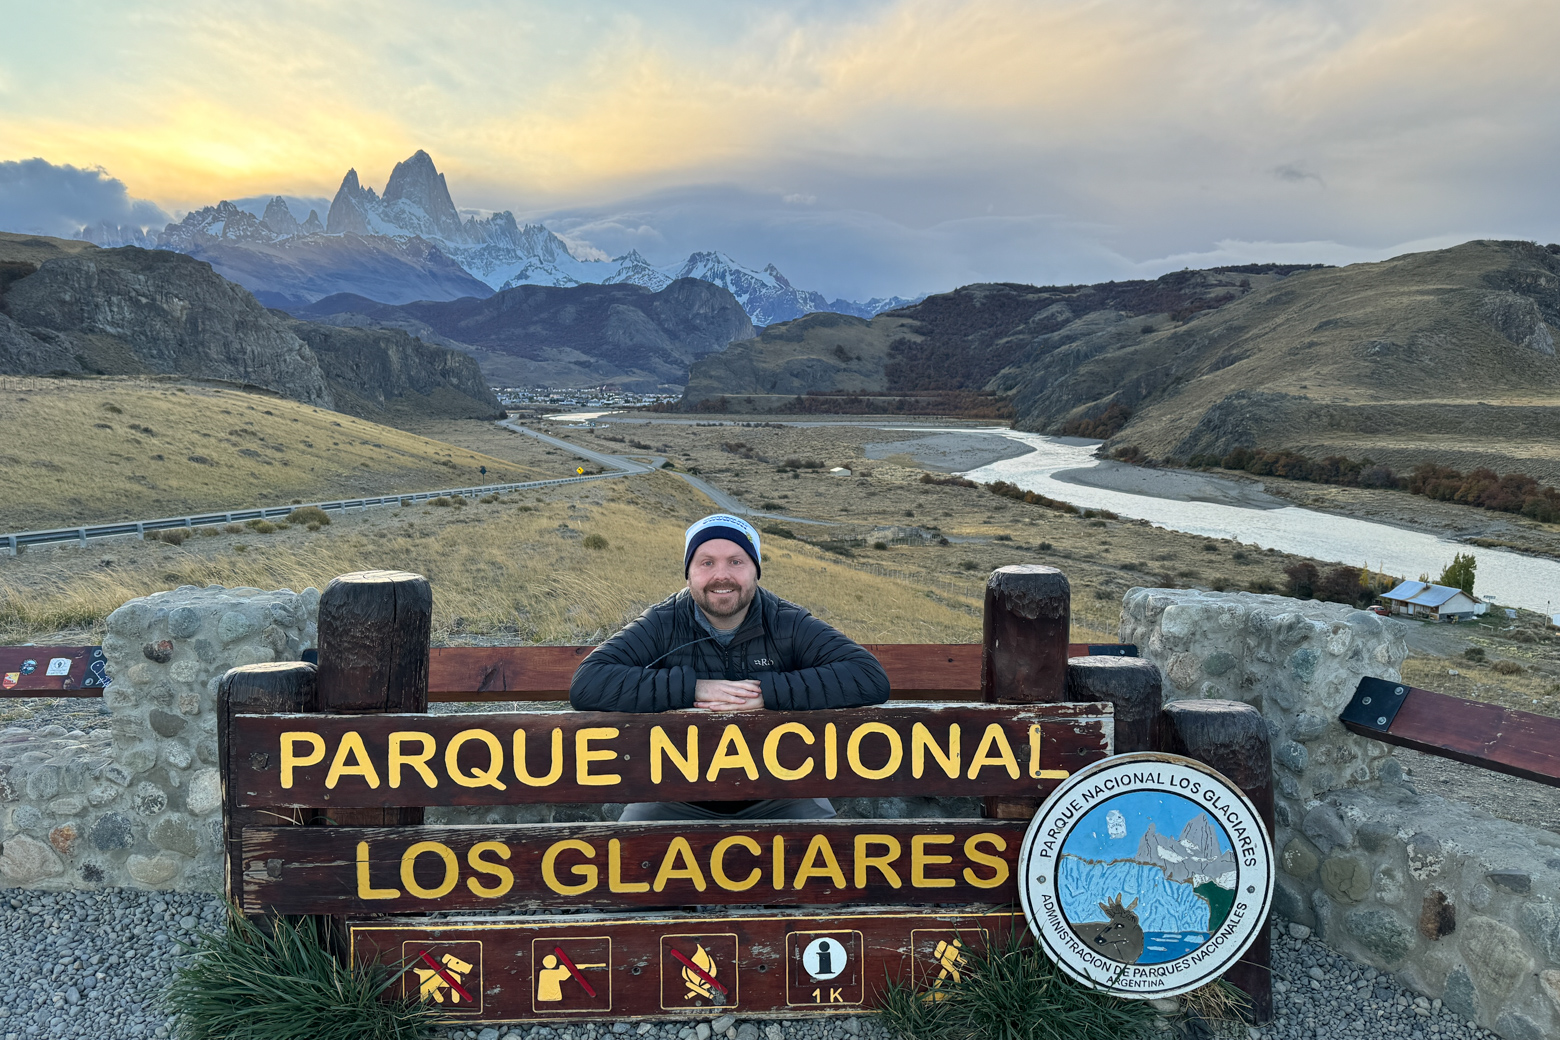
Day 1: Arrival and Drive to El Chaltén
Our Patagonia road trip began in El Calafate, an appealing town on the edge of Lago Argentino. The airport is located about 20km away from the town – we picked up our hire car here and immediately set out for El Chaltén, 136 miles/220km away.
Top Tip: Check you have a full tank of fuel as there are next to no facilities between the airport and El Chalten.
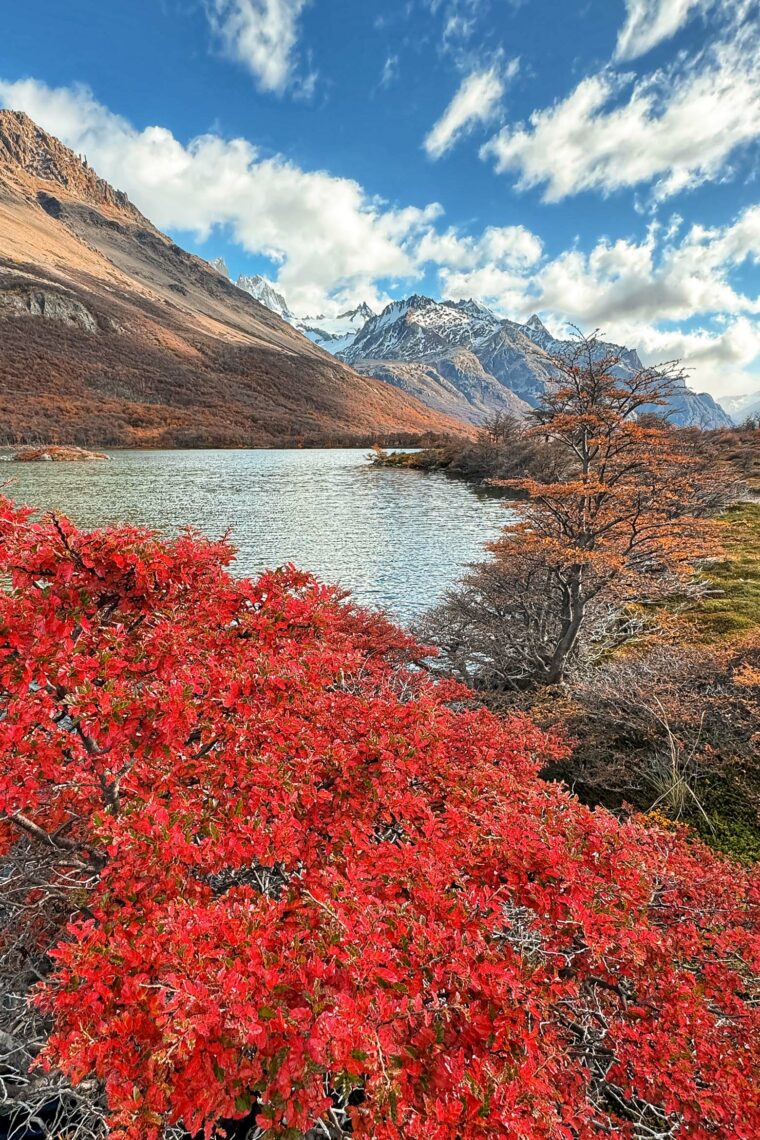
The journey is spectacular: rolling steppes, snow-capped peaks, and the turquoise expanse of Lago Viedma. After a downpour, the sun hitting the highway on the final long stretch of road into El Chalten required pulling over for obligatory photos and just to breath in the air.
The Viedma Glacier viewpoint at the entrance to El Chaten provided our first views of the iconic Fitz Roy massif as it rises dramatically from the horizon. Fun fact: If the view looks somehow familiar, it’s likely because it’s the logo of Patagonia clothing.
Once in El Chaltén, we checked into Hostería El Puma (Lionel Terray 212), a cozy retreat with a hearty breakfast (much needed before hitting the trails). As a bonus it’s also pretty much at the trailhead for the most popular hikes. Dinner was at La Cervecería (Av. San Martín 320), a local favourite for its decent selections of craft beers and wood-fired pizzas.
Top Tip: Be aware due to its isolation, El Chalten is notably more expensive than most other Argentine locations. You’d be well-advised to stock up on your trail mix before arriving.
Days 2 & 3: Hikes to Laguna de los Tres and Laguna Torre
Trail Overviews
| Laguna de los Tres | Laguna Torre |
| Distance: 20 km round trip Elevation Gain: 750 meters Difficulty: Moderate to challenging Duration: 8–9 hours |
Distance: 19 km round trip Elevation Gain: 250 meters Difficulty: Moderate Duration: 6–7 hours |
Over the next two days of our Patagonia road trip itinerary, we completed both of the classic trails around El Chalten. I’d recommend starting with Laguna de los Tres, as the harder hike.
Top Tip: These are the most popular hikes out of El Chalten so start early (by 8.30am in autumn, 7.30am in summer) to maintain the relative serenity of the trail.
Laguna de los Tres trailhead starts less than 100m from the hotel. Seeing the sun rise over the hills and grassland and watching the colours change was a memory I’ll never forget.
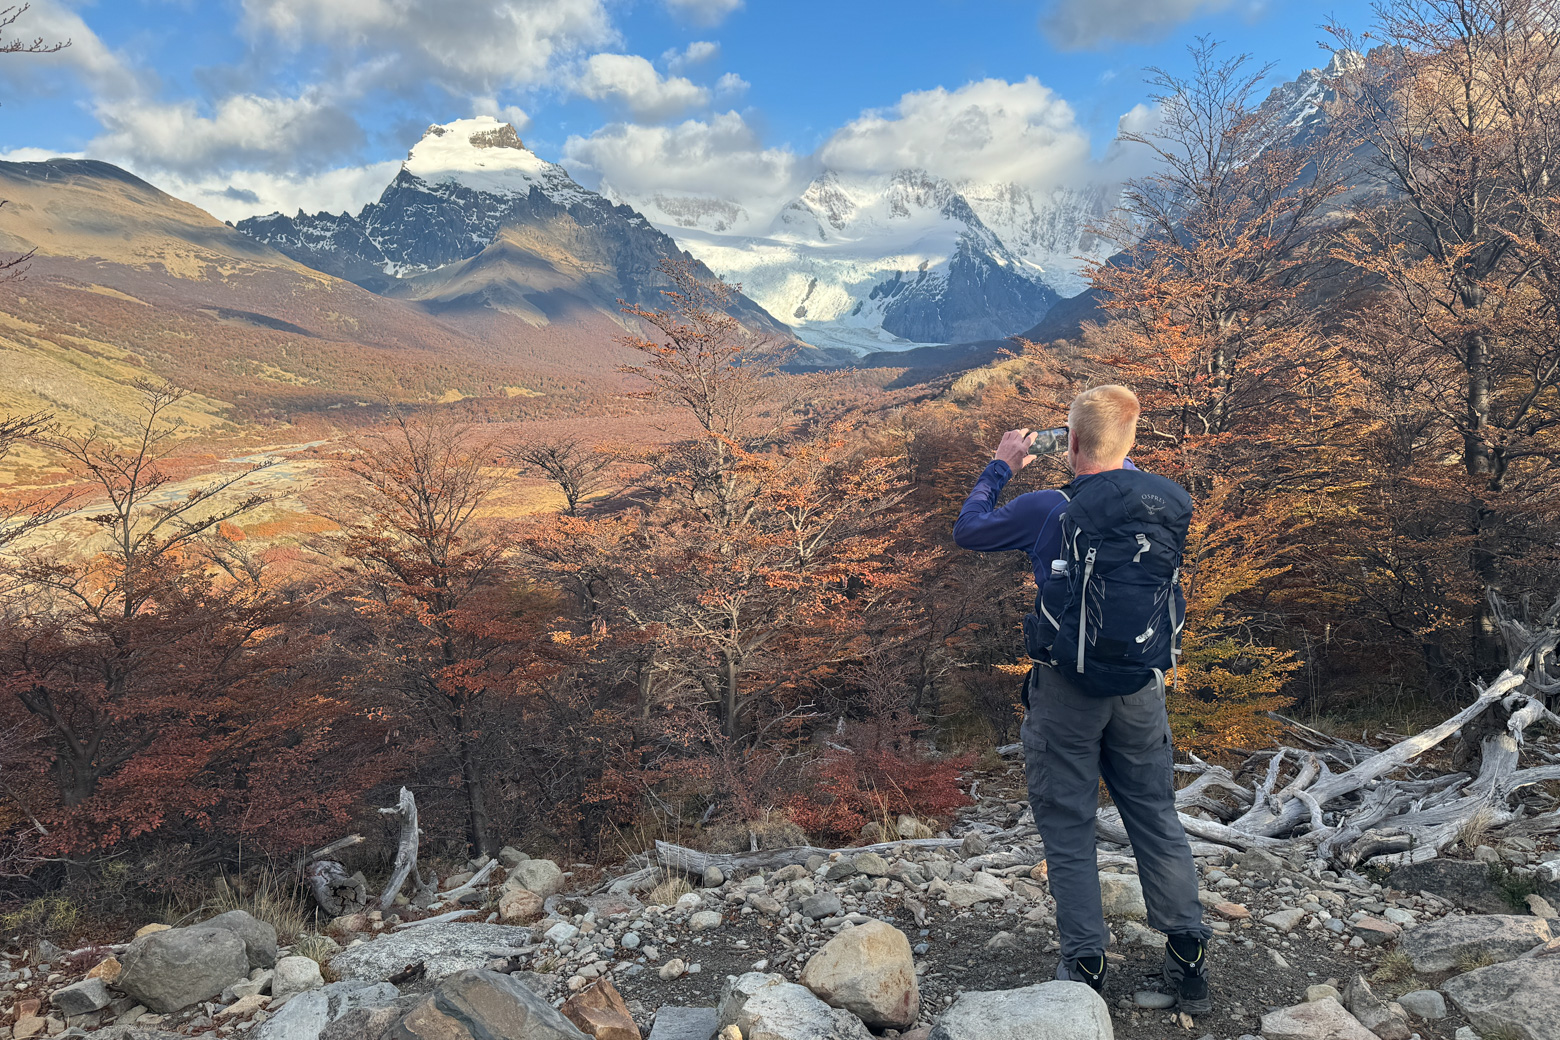
The midsection of the trail levels out, offered a chance to catch our breath as we traversed the Rio Blanco Valley. Stop at Piedras Blancas Glacier viewpoint for a stunning side view of this lesser-known glacier, framed perfectly against the rugged backdrop of the Andes.
The final stretch is a steep, rocky ascent, gaining 400 meters in just over a kilometer, which is tough but manageable – just remember the hiker’s mantra of ‘slow and steady’. As we crested the ridge, Laguna de los Tres came into view. Not for the last time in Patagonia, our jaw dropped as we saw its glacial waters reflecting the towering Fitz Roy peaks.
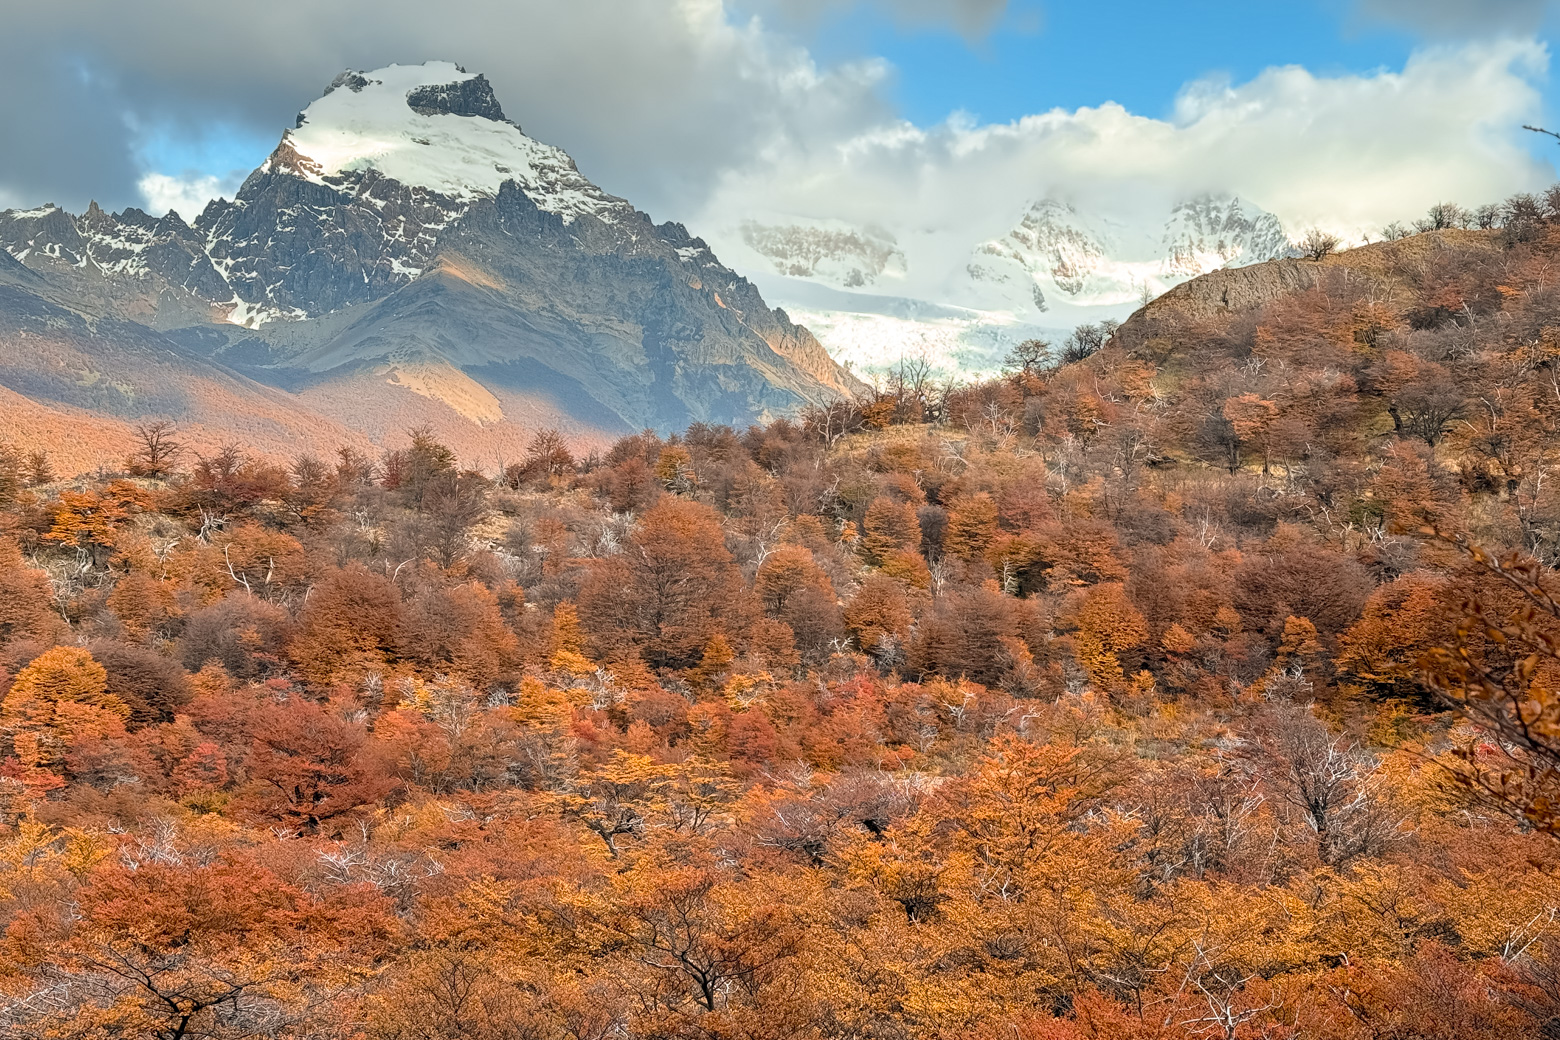
Day Three on the Patagonia road trip was a hike to Laguna Torre. It was a more leisurely, though equally scenic, experience. Taking a slower pace, we were able to appreciate the vibrant foliage albeit the end destination, Cerro Torre, was shrouded in mist.
Travel tip:
If your time in El Chalten is restricted to a single day, you can peel off the Laguna de los Tres trail at about halfway (clearly signposted) and follow the connecting trail to Laguna Madre and Laguna Hija, two tranquil lagoons cradled by forests. This will allow you to get stellar views – albeit not quite as close up – of both Laguna de los Tres and Cerro Torre. Total distance of this round trail is around 20km (so again, start early).
Once back in town after our first hike, we treat ourselves to a steak or plate of empañadas at B Fitz Resto (Av. San Martín 599) which gains delivers hiker-friendly portion sizes and a quality local red beer on draft. Before departing back to El Calafate, we grabbed a coffee and some sugary goodness at La Wafleria (Av. San Martín 640).
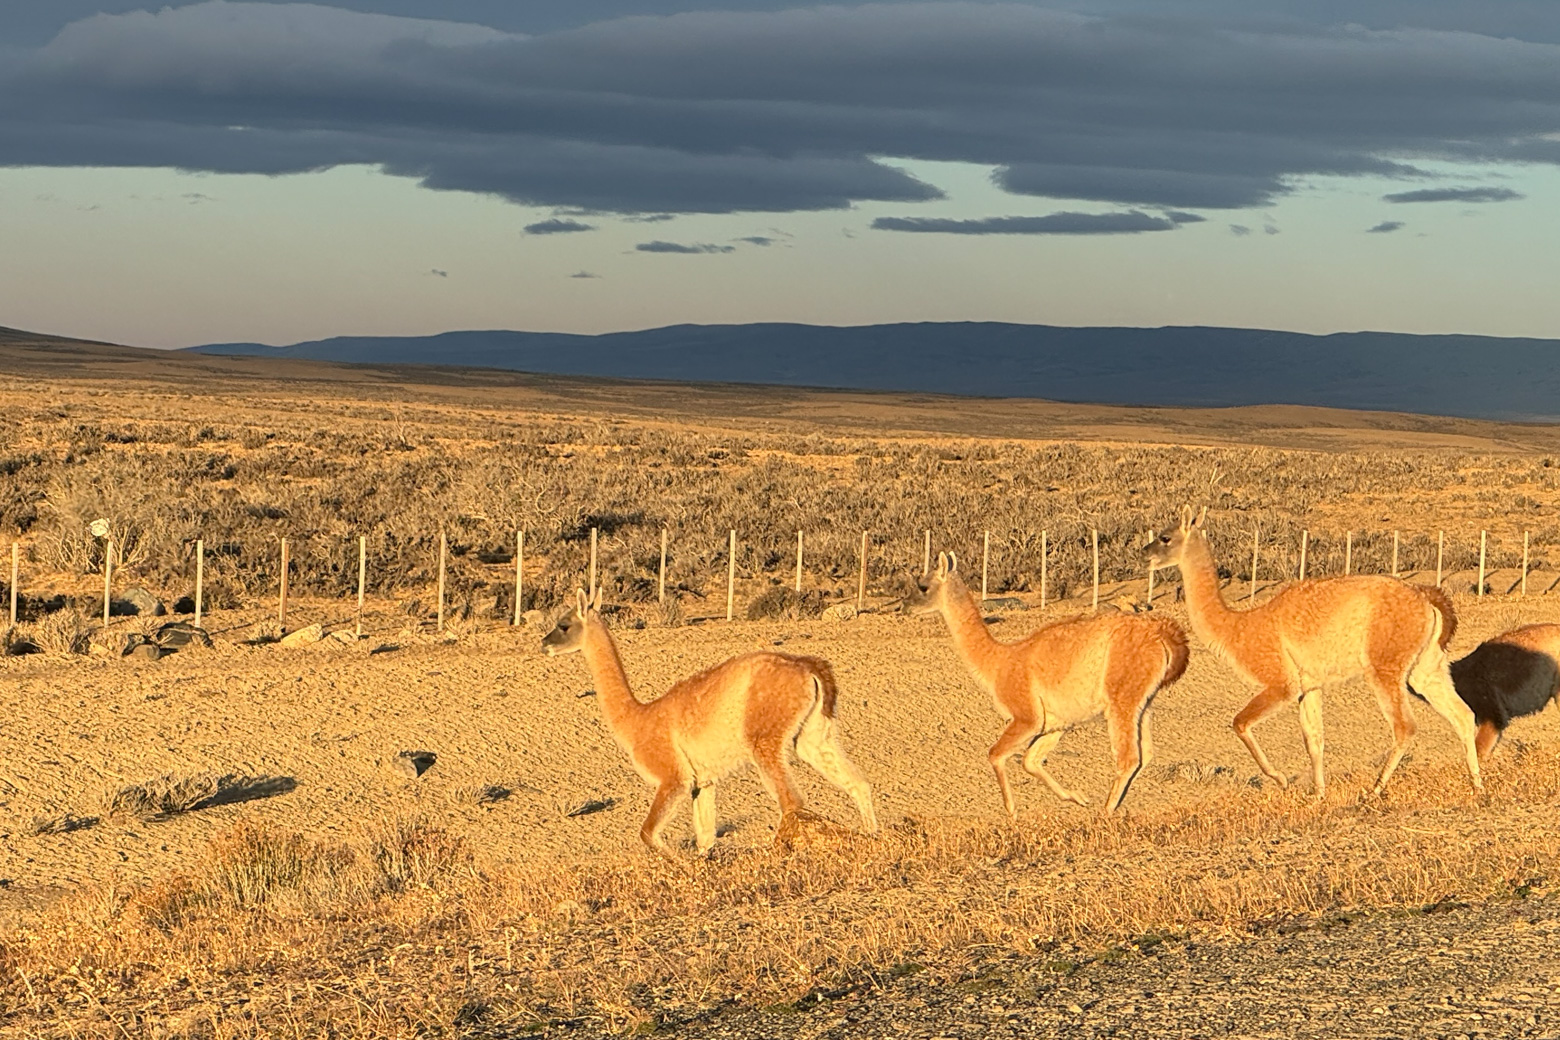
The sunset on the return drive caused yet more photographic stop offs and we even spied the local guanacos (a close relation to the alpaca) gracefully clearing the roadside fences.
Top Tip: If you’re dropping off your car at El Calafate airport, be aware that the shuttle bus into town ($11.000 ARS) coincides with arriving flights, which isn’t always helpful. Taxis outside the airport (there’s also a kiosk inside to book) accept cards and should cost around $33.000 ARS.
Back in El Calafate, we stayed at Hotel Picos del Sur (Puerto San Julian 271) which offered simple, comfortable rooms and superb breakfasts (you may spot a theme in what I value in a hotel when I’m hiking!).
We dined at Isabel Cocina al Disco (Av. del Libertador 1349). Their stews, slow-cooked in cast-iron discs, were the ultimate comfort food after two days in the mountains. I had my best night’s sleep in years!
Ready for day 4 of the Patagonia road trip itinerary?
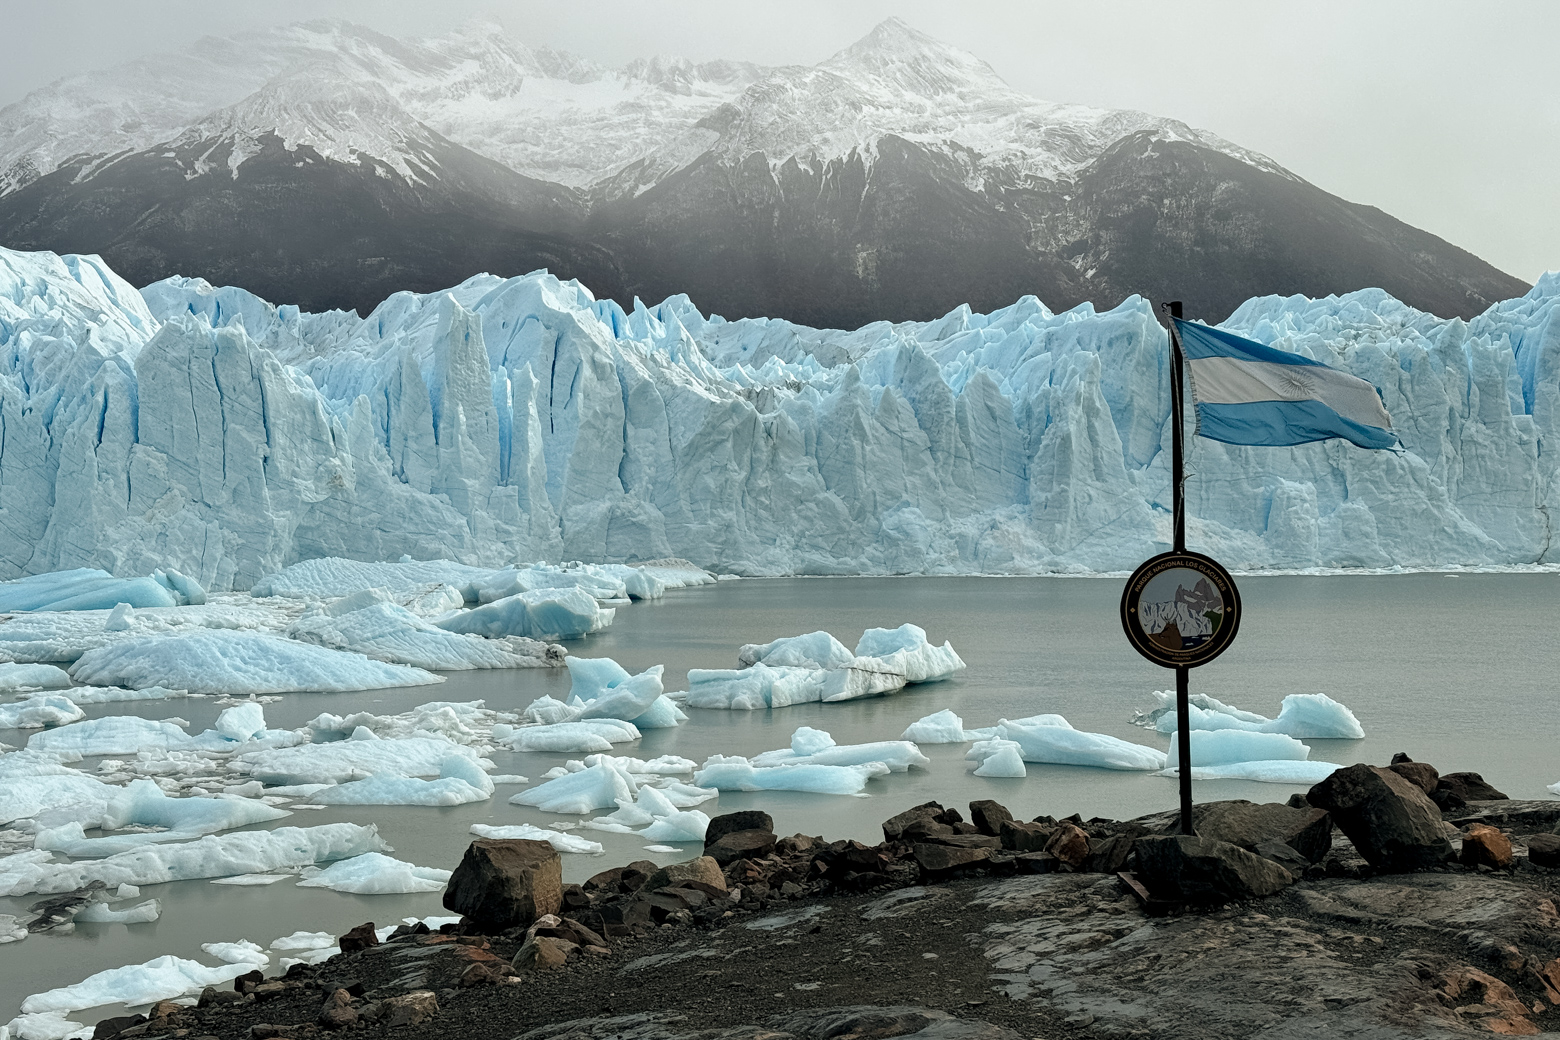
Day 4: Glaciar Perito Moreno
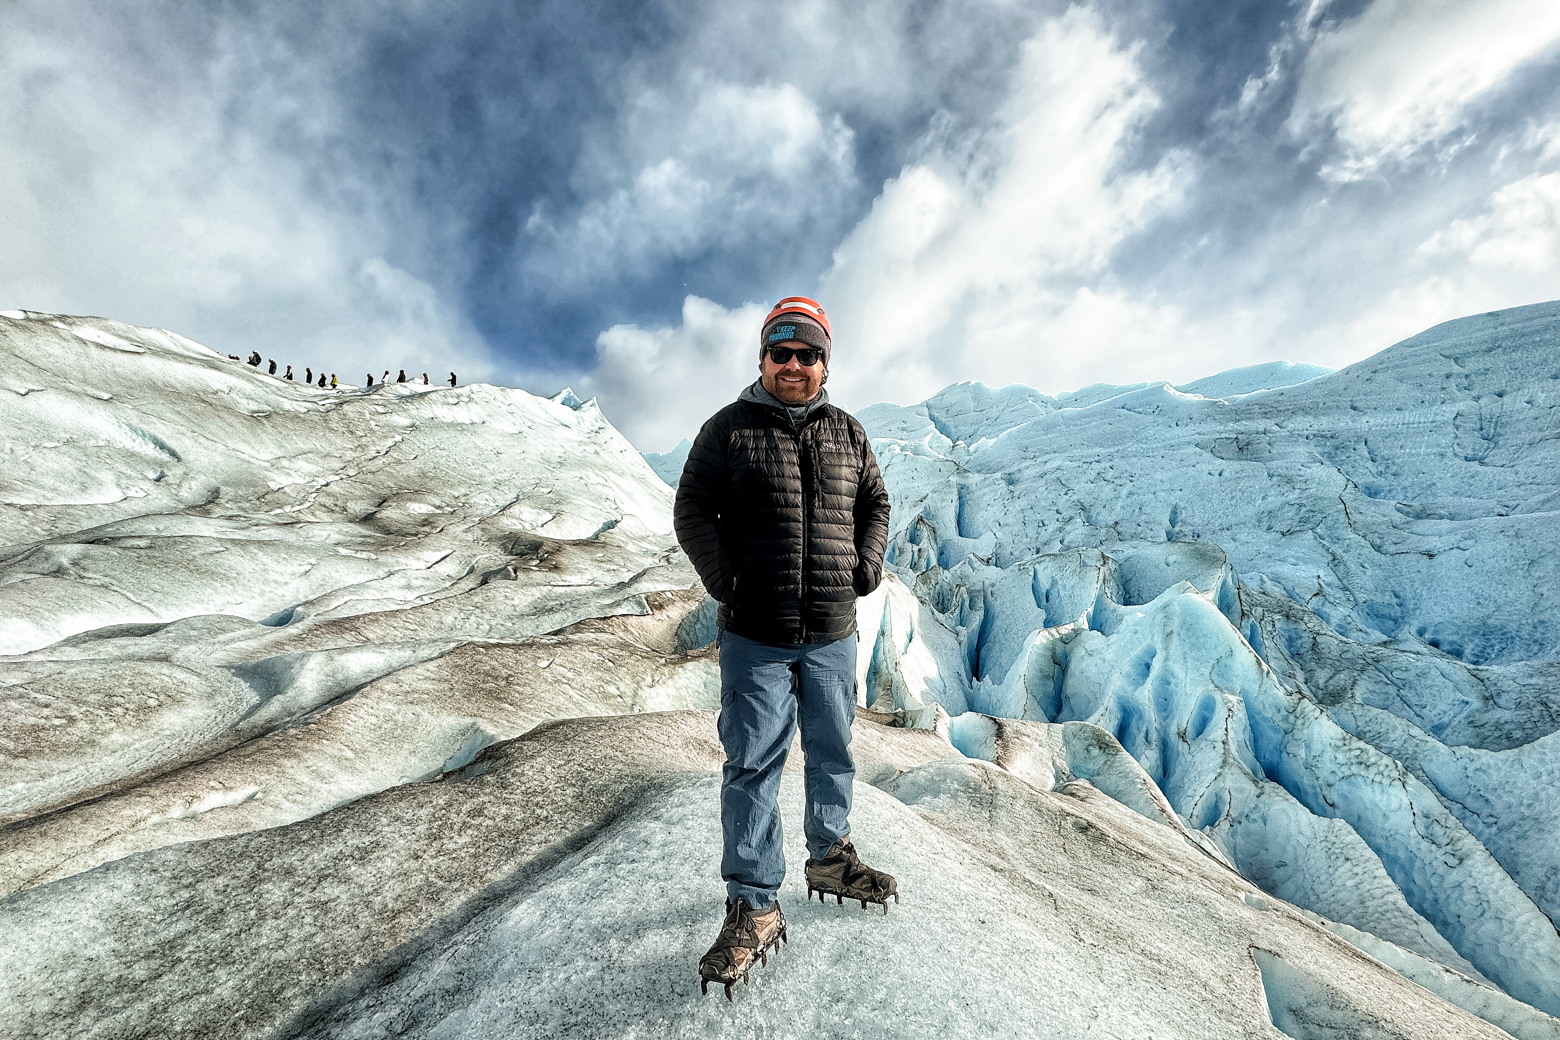
The Perito Moreno Glacier is one of the world’s most accessible and awe-inspiring ice fields. Access is limited to a small number of private operators.
Our choice was Hielo y Aventura, whose tour include transport from the hotel, lunch and the specialist gear we’d need to hike on the ice. We chose the ‘Minitrekking’ tour, which allowed us a short hike on the glacier itself.
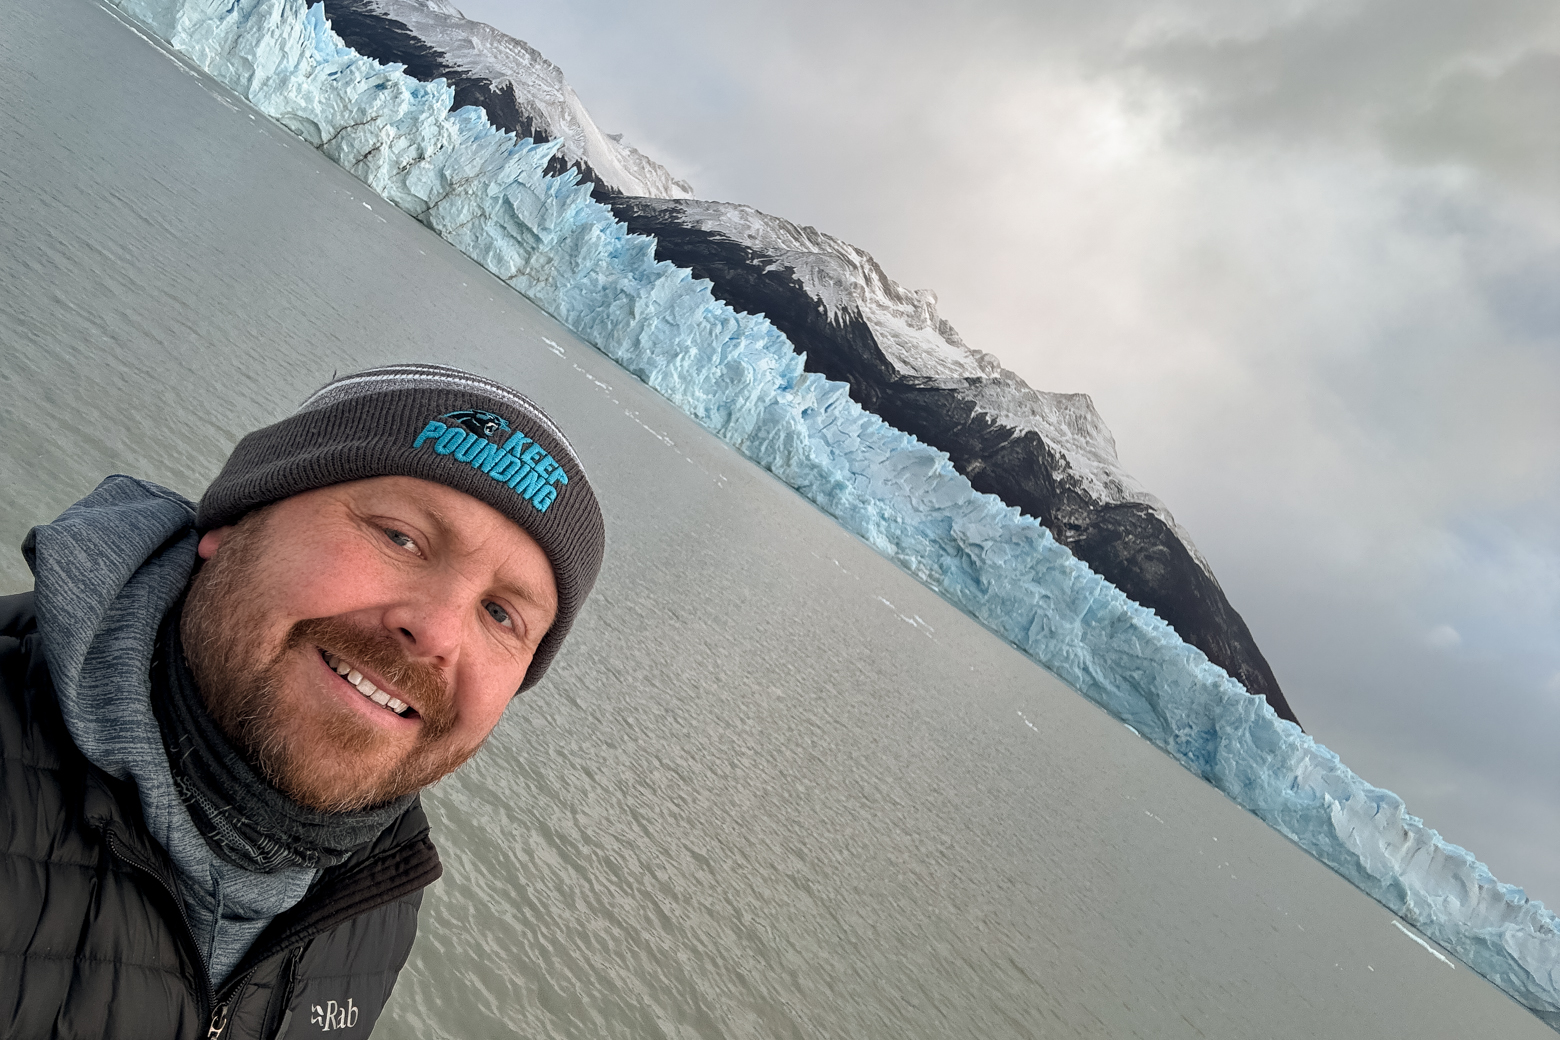
A boat ride provided close-up views of the glacier’s south face but nothing compared to the view once I stood on the glacier itself (thankfully with proper crampons to stop me sliding to an icy doom!).
The ice beneath my feet glowed in more shades of white and blue than I’d ever thought possible, punctuated by deep crevasses and crystalline pools. Our guide whipped out a bottle of Argentina whiskey, served with 5,000 year-old ice as garnish – one hell of a party trick and a fitting way to toast this remarkable landscape.
This, in my opinion, is one of the best things to do in Patagonia! A highlight of our Patagonia road trip itinerary!
The afternoon provided an alternative view – via coach and walking – above the glacier from the park’s boardwalks. Returning to El Calafate by early evening, we celebrated our final dinner in Argentina, at Morrison’s Restaurant(Puerto Deseado 22), a 5-minute walk from the hotel. The local lamb sorrentinos and goulash with gnocchi attract visitors from all over the globe and provided a fitting farewell to Argentina.

Day 5: Onwards to Chile
Time to see the other side of Patagonia with a journey across the border, starting at 8am. Our hotel arranged a taxi for the short transfer to the bus station. The journey is as scenic as we’d expected and the border crossing was noteable only for its remoteness, being literally a house in the middle of nowhere.
Top Tip: Complete your Chilean Customs Affidavit form (available online) in advance of travel. The bus company will want to see this before issuing your ‘official’ ticket, which you’ll need even if you’ve already bought online.
Top Tip: Upon arrival, you’ll be given a ‘PDI’ (entry) form to keep until you leave Chile. Store it somewhere safe unless you want a world of bureaucratic pain!
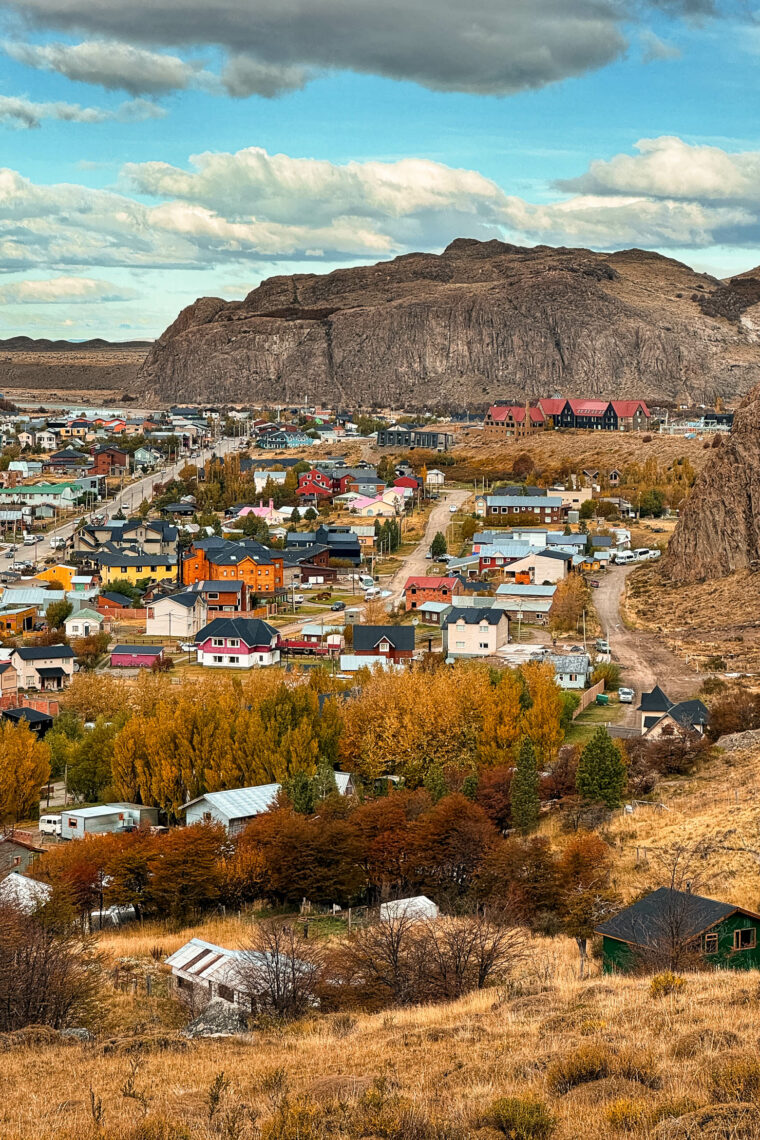
Puerto Natales, our destination, was 5-6 hours away so get comfortable! Once a hub for sheep farming, it is now more famous as the gateway to Torres del Paine national park. We stayed at Hotel Baquedano (Baquedano 570) a 10-minute stroll to the town centre and spent a relaxed afternoon strolling along the attractive waterfront and visiting the Municipal Historical Museum, which showcases the town’s history and indigenous heritage. For dinner, we greatly enjoyed Santolla (Blanco Encalada 282), where local king crab was the star of the menu.
Top Tip: Chile is an hour behind Argentina but because you’re so close to the border, phones and smartwatches are liable not to pick up the time change. For early starts to Torres del Paine, you may want a wake-up call, rather than being roused by the hotel proprietor to advise that your driver has arrived and is waiting impatiently…just saying…
Days 6 & 7: Torres del Paine: Base of the Towers and Laguna Grey
Trail Overviews
| Base Towers | Laguna Grey |
| Distance: 22 km round trip Elevation Gain: 900 meters Difficulty: Challenging Duration: 9-10 hours |
Distance: 11 km round trip (to the viewpoint) Elevation Gain: c. 200 meters Difficulty: Moderate Duration: 4–5 hours |
Torres del Paine is Patagonia’s other blockbuster National Park. It’s about 2hrs from Puerto Natales to the park gates (accommodation nearer the park is scarce and expensive) and so requires both an early start and a little more planning.
We used Viator to book a driver and guide. You can also hire a car from Puerto Natales airport. Either way, we knew we needed to leave town by 6.30am latest.
Top Tip: You can save yourself time at the entrance to the park by buying the National Park permit (CLP 31,200, valid for up to three days) here.
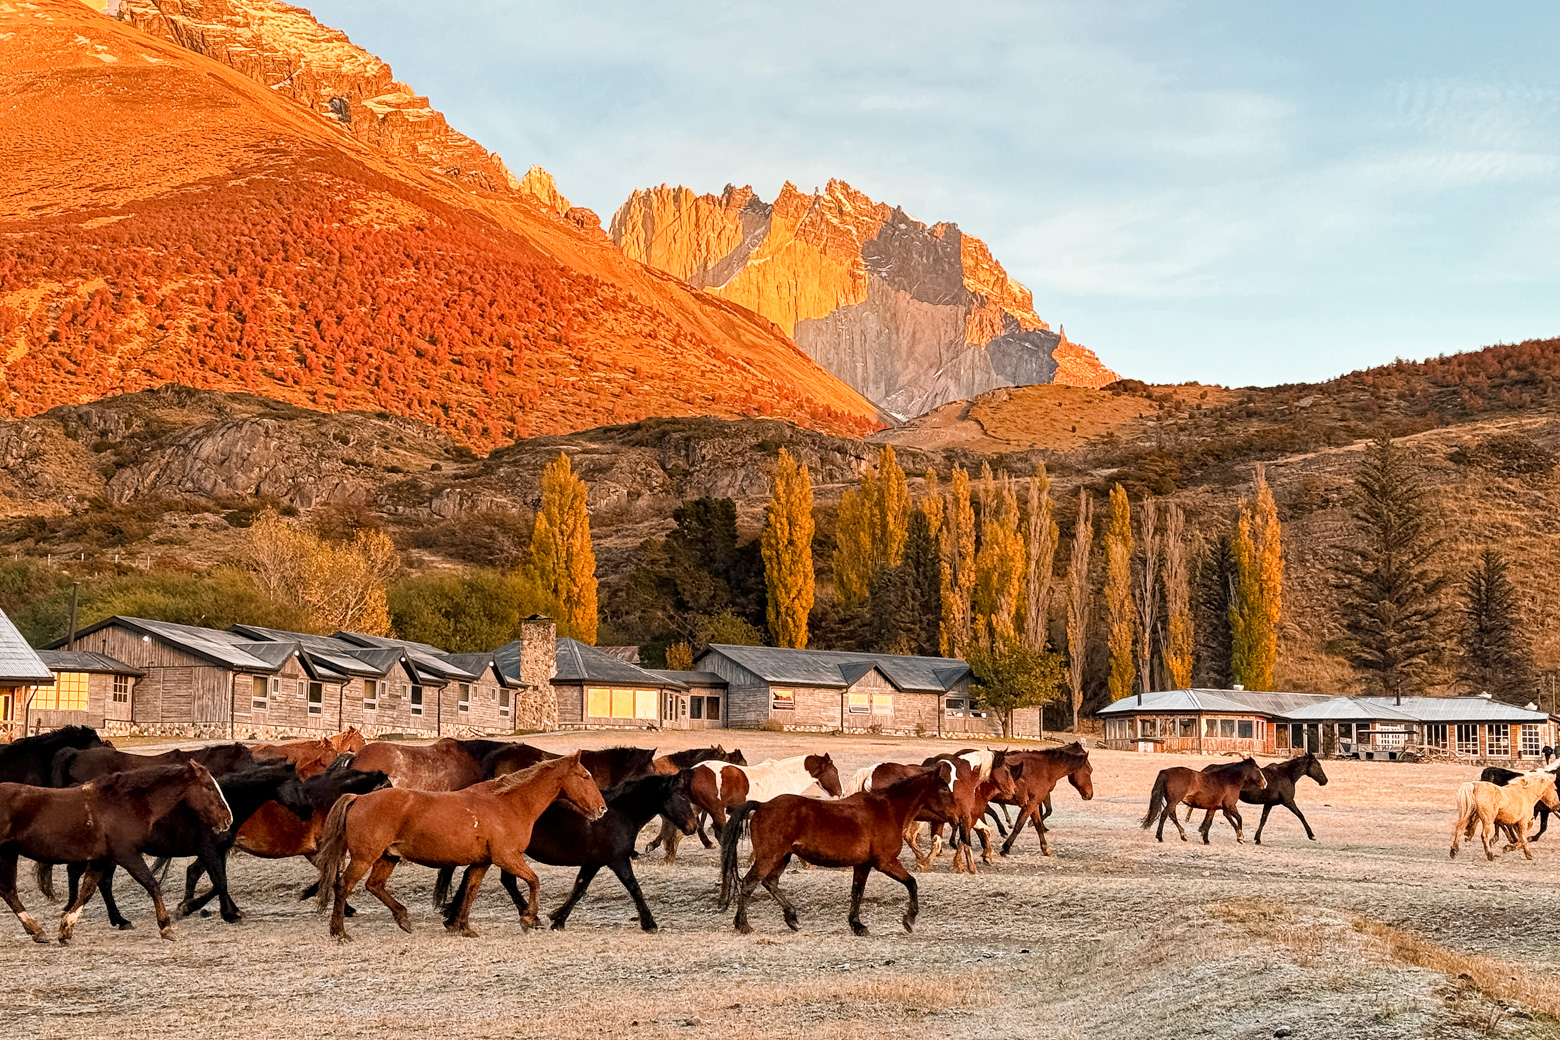
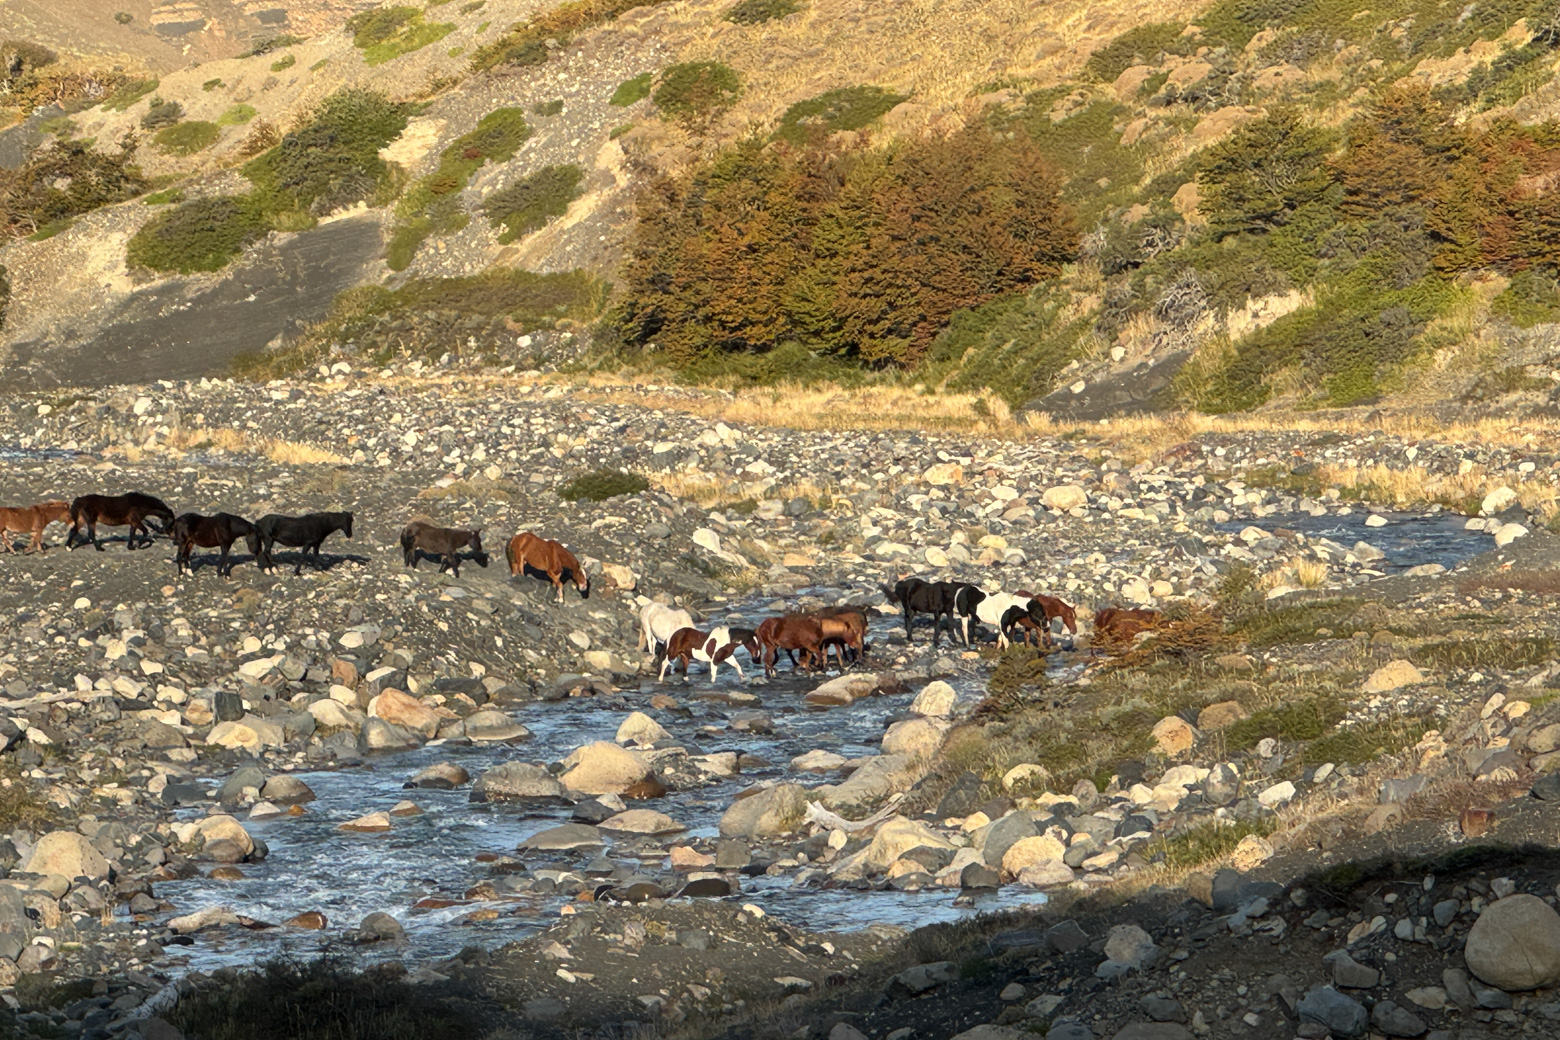
Base Towers is the view we’d seen in every Instagram tag of Torres del Paine. We began this hike as the dawn breaks from the Welcome Center (toilets and water available), with a pack of wild horses forming something of an honour guard. The ascent through the Ascencio Valley and along the Torres River is reasonably gentle with a hostel about halfway up offering bathroom and water stops.
The final section is a challenging steep rocky moraine that separated us from the towers themselves. It took us an hour to navigate the final mile to the summit, ‘slow and steady’ again being the watchword.
Once we crested the ridge, the Base Towers came into view: three granite spires reflected in a turquoise lagoon. If there are better views for a packed lunch in the world, I’m yet to find them.
After a tricky descent down the moraine, the remaining hike back is a delight, particularly the final third through the Ascencio valley. It’s a long day but worth every single minute hiked, view photographed and calorie burnt!
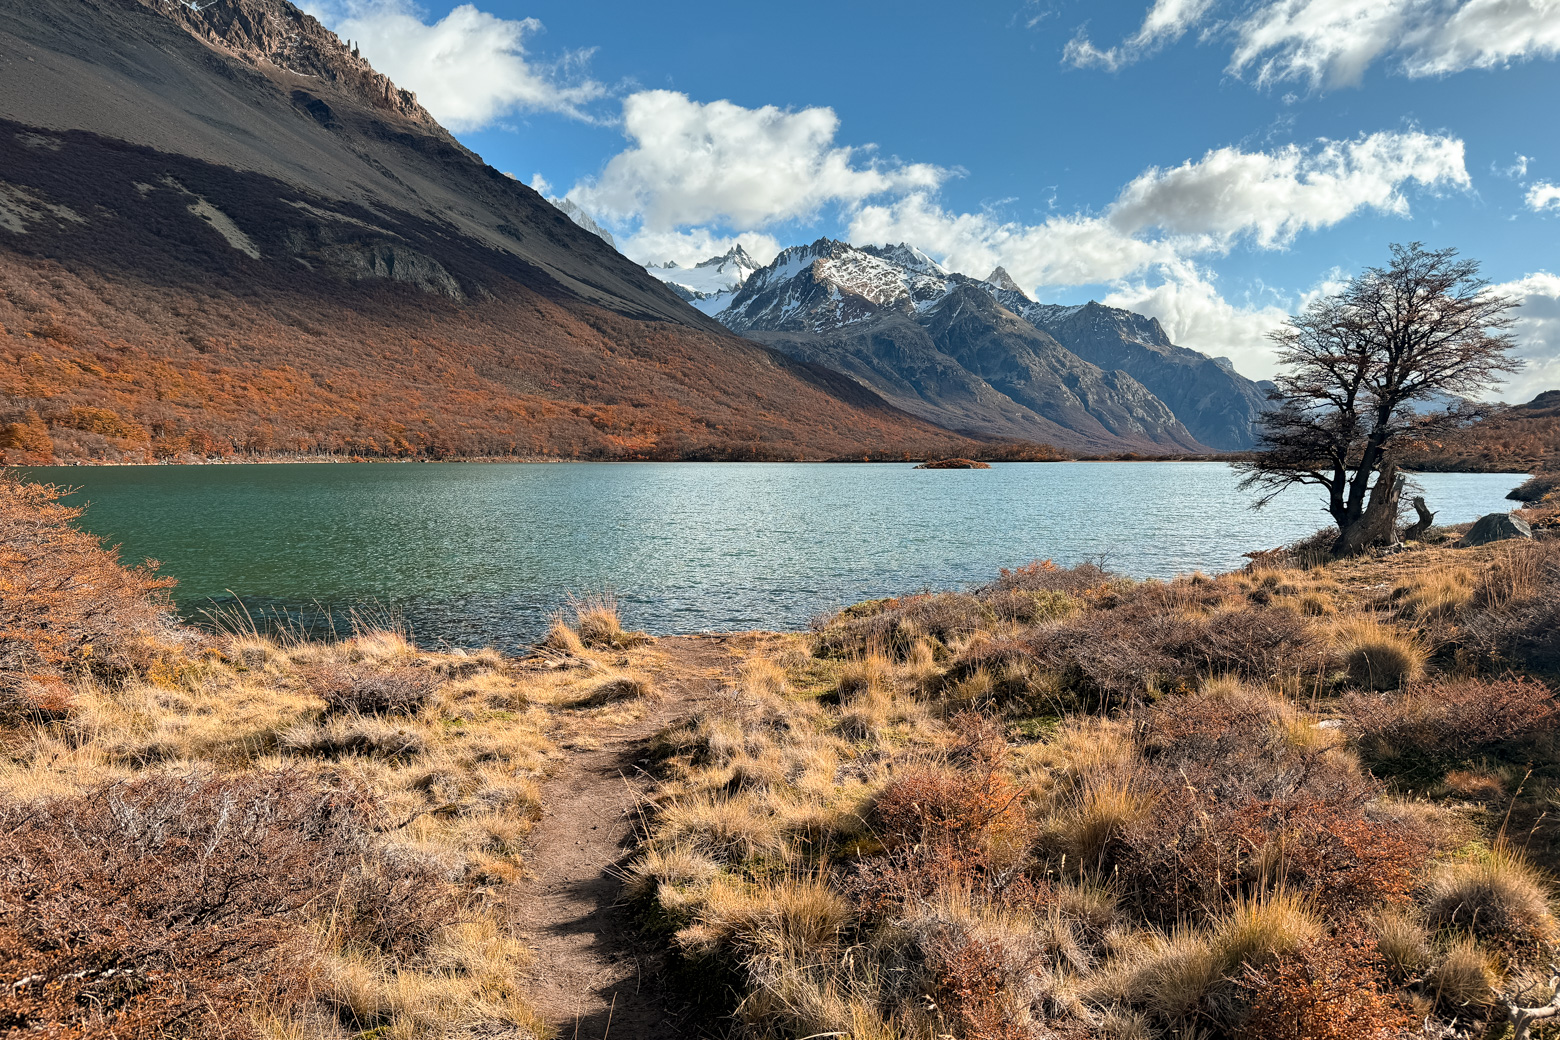
The following day of our Patagonia road trip, we returned to Torres del Paine but for a much more leisurely stroll. The trail to Laguna Grey begins near Grey Lodge and took us through largely level-grounded forests before transitioning to gentle hills. Midway, the trail ascends slightly, offering sweeping views of Laguna Grey and the Grey Glacier beyond. Icebergs float serenely on the lagoon, their luminous blues contrasting against the dark waters.
On the way back to Puerto Natales, we took a pitstop at the Cuevas de Milodon (Milodon Caves), named after the prehistoric giant sloth once endemic to this region. The caves themselves make for an interesting stroll with the views (in case more were needed) of the surrounding landscape particularly impressive.
We weren’t back at Puerto Natales until after dark both days, so we picked dinner spots with late closing times. Entre Pampa y Mar (Arturo Prat 379) was our favourite with the local guanaco the star of the menu. For our final night in Patagonia, we also sampled a couple of Calafate Sours, a twist on the classic pisco sour but with the addition of calafate berries. According to local tradition, sampling these berries (including in cocktail form) guarantees a return to Patagonia.
Frankly, I was already looking up return itineraries before the second drink arrived!
Moving On
Assuming you’re not extending your stay in Patagonia (let’s face it, if you can, you should extend your Patagonia road trip), you have three options:
· Air: Puerto Natales airport is tiny but functional with one daily flight (leaving early afternoon) to Santiago and season flights to Puerto Montt in Chilean Tierra del Fuego.
· Bus: Retrace your steps to El Calafate: buses leave at 07.00 and 15.00 – buy tickets at Busbud.
· Car: The world is your Patagonian oyster!
Have you been on a Patagonia road trip?
What are the best things to do in Patagonia in your opinion? Anything you’d add to this Patagonia road trip bucket list?
See more of Phil’s adventures on Instagram here
")


